
Don’t Let Wind Ruin Your Perfect Shot
A professional guide to capturing stadium-quality audio in the most challenging outdoor conditions.
Nothing ruins the excitement of a great sports recording faster than the deafening roar of the wind. That frustrating, low-frequency rumble can overwhelm every cheer, comment, and crucial on-field sound. It’s a common problem for creators everywhere, from Johannesburg to London. Fortunately, you don’t have to surrender to the weather. With the right preparation, equipment, and techniques, you can capture crisp, clear audio every time.
This guide will walk you through everything you need to solve your audio issues when recording windy matches. We will cover on-location strategies, essential gear, and even post-production fixes to ensure your sound is as professional as your video.

Before You Press Record: On-Location Strategies
Your first line of defense against wind happens before you even touch your gear. Being strategic about where and how you set up can make a massive difference. A little planning goes a long way.
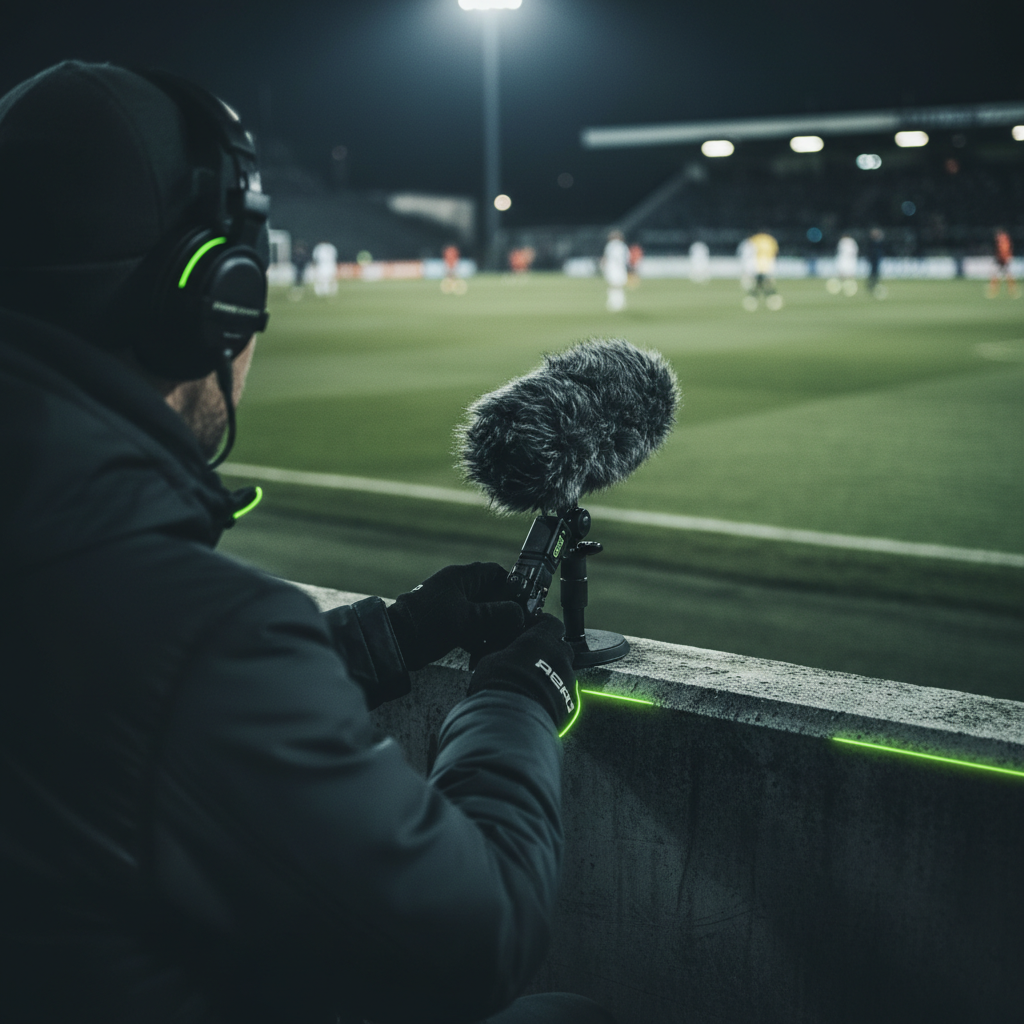
First, look for natural shelters. Can you position yourself downwind from a building, a vehicle, or even a large tree? These structures act as physical barriers, creating a pocket of calmer air for your microphone. Similarly, you can use your own body to block gusts from hitting the microphone directly.
In addition, microphone placement is critical. Always place the microphone as close to your sound source as possible, whether it’s a commentator’s mouth or an athlete. This simple step dramatically improves the ratio of desired sound to background noise. If you’re using a small lavalier (or lapel) mic, try tucking it just inside clothing for an extra layer of protection.
Gear Up: Your Essential Wind-Fighting Toolkit
While strategy is important, having the right equipment is non-negotiable for recording in windy conditions. Investing in proper wind protection is one of the best things you can do for your audio quality.
Choosing the Right Microphone
- 01.Omnidirectional Mics: These microphones pick up sound from all directions. Their diaphragms are often more robust and less sensitive to the air pressure caused by wind.
- 02.Directional (Shotgun) Mics: While more prone to wind noise, these are often necessary to isolate specific sounds from a distance.
- 03.Dynamic Mics: These are generally less sensitive than condenser mics, making them a solid choice for windy outdoor reporting.
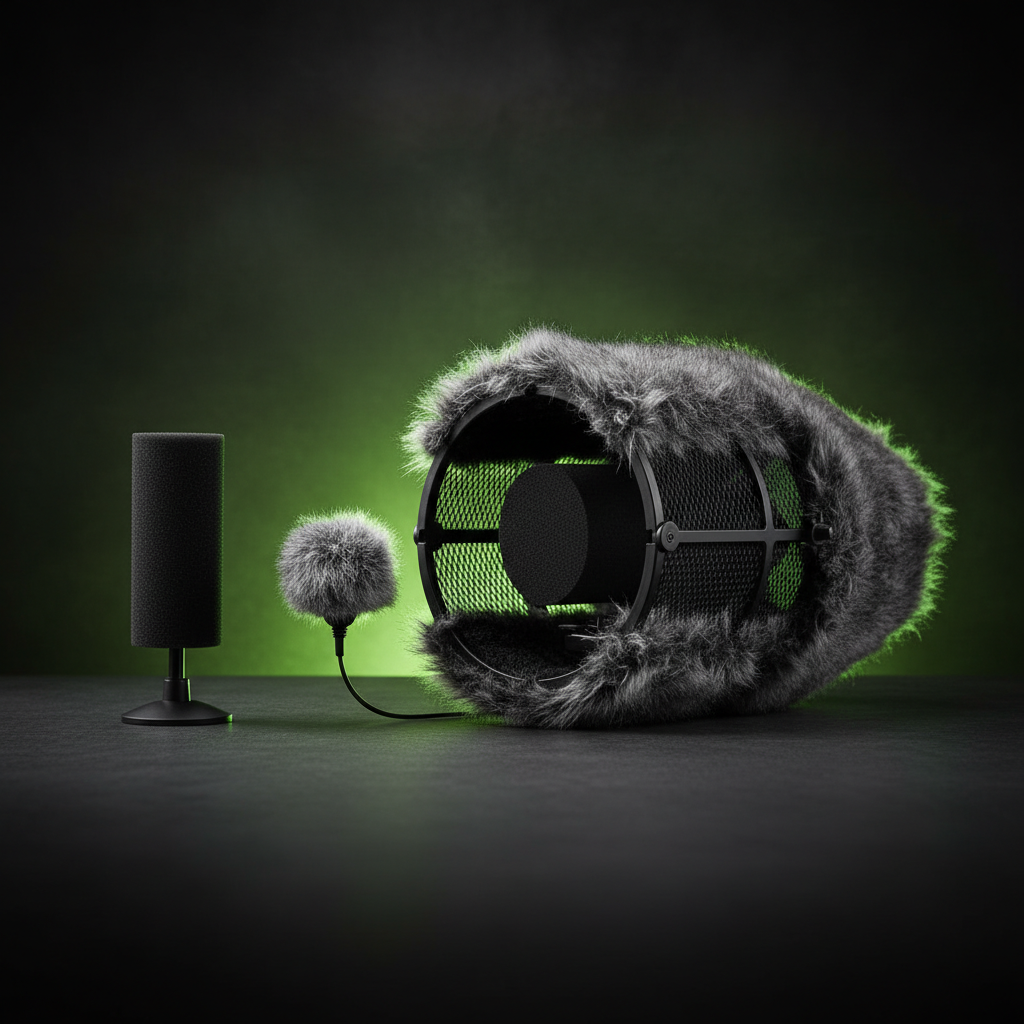
The Power of Wind Protection
This is where the real magic happens. Layering your wind protection is key to success.
Foam Windscreens
Basic protection for light breezes. Usually included with most mics.
Furry Windscreens (“Dead Cats”)
The most crucial piece of kit. High-quality synthetic fur cover designed to absorb wind energy.
Blimps (“Zeppelins”)
Ultimate solution for extreme conditions. Encloses the mic completely.
Dial It In: Smart Recording Settings
Your gear is only part of the equation. You also need to adjust your camera or recorder’s settings for the best results.
Firstly, turn off Automatic Gain Control (AGC). This feature will amplify the loud wind noise during any pause in speech, making the problem worse. Instead, set your audio levels manually.
Secondly, use a low-frequency cut filter. Wind noise is mostly a low-frequency “rumble.” Many professional microphones and recorders have a “low-cut” or “high-pass filter” switch. Engaging this feature electronically filters out the problematic bass frequencies.
The Final Polish: Post-Production Fixes
Sometimes, despite your best efforts, some wind noise makes it into your recording. Thankfully, modern software can help clean it up.
You can use an Equalizer (EQ) in your editing software to manually reduce the low frequencies, typically between 20Hz and 250Hz. This can effectively lower the wind’s rumble.
Moreover, many programs now offer AI-powered tools. Features like “Wind Removal” can analyze your audio and intelligently remove the noise with just a single click, saving you time and effort in the editing process.
Capture Perfect Audio, Whatever the Weather
Recording clean audio during a windy sports match can feel like a challenge, but it is entirely achievable. By combining smart on-location strategies and the correct gear, you can conquer the wind.
Don’t let bad weather compromise your content.


