
Want to broadcast your local team’s games but lack a professional budget? You’re in the right place. It’s now easier than ever to produce a high-quality sports stream using just a laptop. The key is a powerful and free piece of software: OBS Studio.
This guide will walk you through everything. We will cover the essential gear you need to get started. In addition, we’ll explain how to set up professional-looking scoreboards and even instant replays. Let’s transform your amateur stream into a top-tier broadcast.
Your Amateur Starter Kit: Essential Hardware
Before you even touch the software, you need to get video and audio into your computer. Fortunately, you can start with a very small budget. Good equipment makes a huge difference in stream quality.
Choosing Your Camera
- Budget Option: Use free apps like VDO.Ninja to turn your phone into a high-quality wireless camera.
- Pro-Am Upgrade: A camcorder or DSLR allows for a real zoom lens, crucial for following the ball.
Getting Clear Audio
Never use your laptop’s built-in microphone. It will pick up too much wind and background noise. Instead, invest in a commentary headset. This type of headset keeps the microphone at a perfect distance from your mouth. Consequently, it blocks out crowd noise and ensures your voice is always clear.

The Most Important Connection
Whenever possible, connect your laptop to the internet with an Ethernet cable. Sports have a lot of fast motion. Unstable Wi-Fi can cause your stream to lag or look pixelated, but a wired connection provides the stability you need.
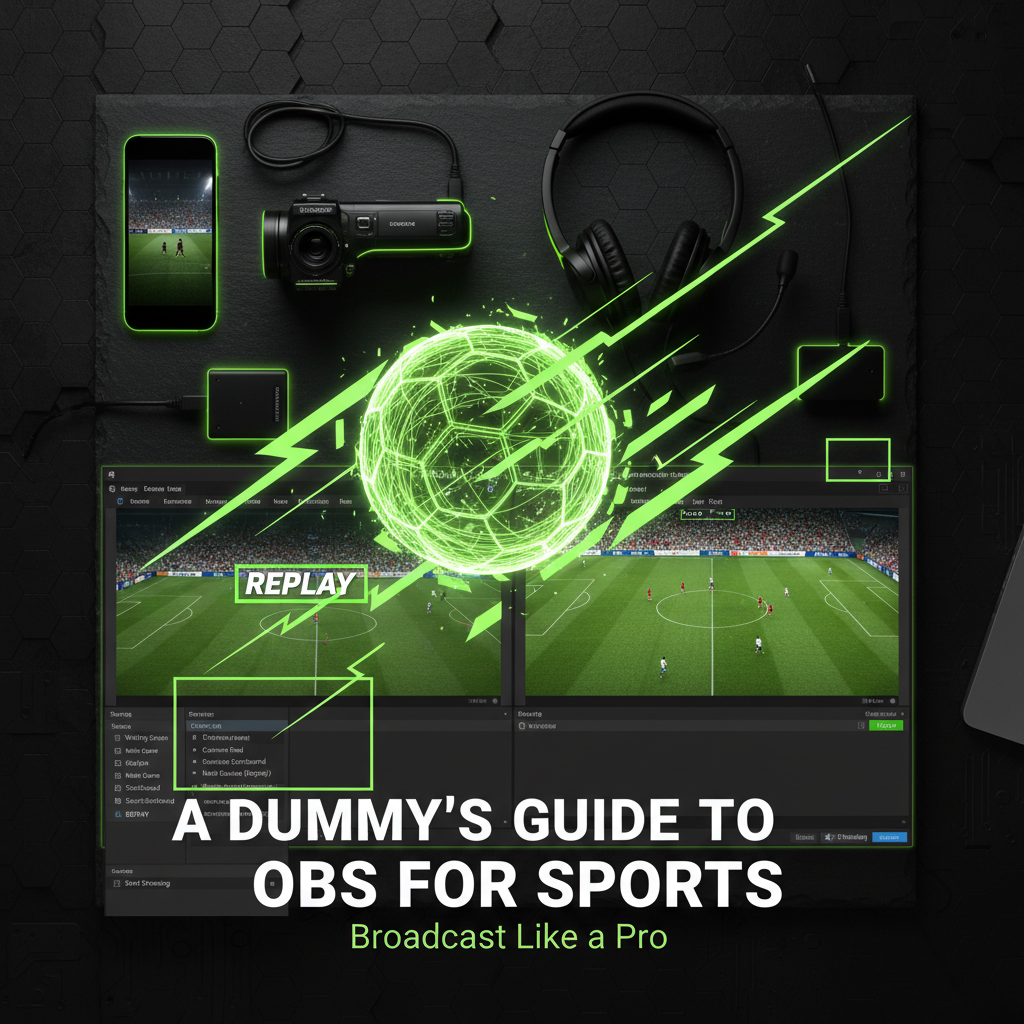
Setting Up Your Broadcast Scenes in OBS
In OBS, a “Scene” is simply a layout of your sources, like a camera feed or an image. Think of them as presets you can switch between during the broadcast. First, you should create a few basic scenes in the “Scenes” box on the bottom left of the OBS window.
Waiting Scene
A static image or loop displaying “The Game Will Begin Shortly” and logos.
Main Game
Your primary camera feed shows the live action of the game.
Scoreboard
Full-screen view for timeouts, perhaps with a small announcer window.
Adding a Live Scoreboard for a Pro Look
Manually updating the score with text is difficult and looks unprofessional. A much better way is to use a “Browser Source.” This method pulls a scoreboard from a website directly into your stream.
How to set it up:
- Visit a free scoreboard website like KeepTheScore.com.
- Customize the scoreboard with your team names and colors on their site.
- The website will provide you with a unique URL link for OBS.
- In OBS, click the + symbol in the “Sources” box, choose Browser, and paste the link.
You can now control the score from a separate device, like your phone or a tablet. This allows you to update the score instantly without interrupting your view of the game on the laptop.
The Holy Grail: Instant Replay
Believe it or not, you can set up instant replays in OBS. This feature uses the “Replay Buffer,” which constantly records the last few seconds of your stream.
Enable Replays
Go to Settings > Output > Replay Buffer and check the “Enable” box. Set the duration to about 10 or 15 seconds. Next, you need a hotkey. Go to Settings > Hotkeys, find “Save Replay,” and assign it to R.
Using Your Replay
When a great play happens, press R. To show it, switch to a pre-made “REPLAY” scene with a Media Source pointing to your save files. For more, check the Official OBS Project Blog.
Optimized OBS Settings for Sports
Fast-moving sports can look like a blurry mess with the wrong settings. To avoid this “green mush” effect, optimize your output:
Frame Rate
Never drop below this for sports; anything less looks choppy during fast action.
Bitrate
Aim for 6,000–8,000 Kbps for a crisp 1080p stream at 60fps.
Encoder
If using an Nvidia card, use NVENC to free up your CPU and prevent lag.
Your Pre-Game Checklist
Technical difficulties can ruin a broadcast. Therefore, you should always run through a quick checklist about 30 minutes before the game starts.
A final pro tip is to use Studio Mode. This button in OBS splits your screen into a “Preview” window and a “Live” window. It lets you prepare your next shot or update a graphic on the left side before you push it live to your audience on the right. Another great source for OBS tips and tricks is this helpful guide.
Conclusion
Broadcasting local sports is no longer reserved for major networks. With the free and powerful OBS Studio, a little bit of practice, and the right gear, you can create a stream that looks and feels professional. By setting up dynamic scenes, integrating a live scoreboard, and mastering instant replays, you can give your local team the coverage it deserves. So, get out there, follow this guide, and start streaming.


